|
2.
|
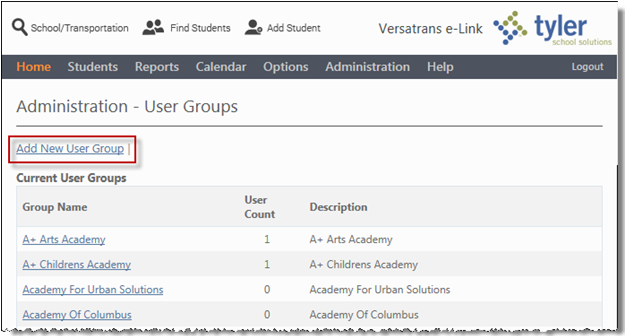
In the Administration - User Groups screen, click the Add New User Group link to display the Add New User Group screen.
|
|
6.
|
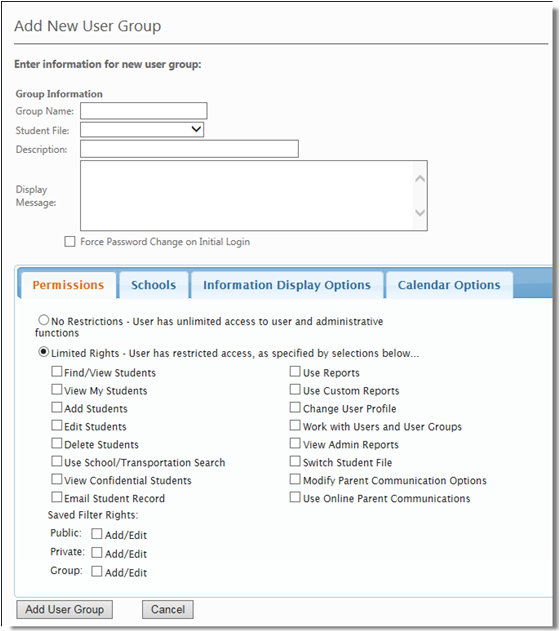
Click Force Password Change on Initial Login to allow the user with Administrator permissions to force a password change for any new user created for this group the first time they log in.
|
|
7.
|
Click No Restrictions when you want to give a user unlimited access to user and administrative functions.
|
|
8.
|
Click Limited Rights when you want to restrict a users access to user and administrative functions. To select a permission, click the check box beside it to display a check mark. Check as many as are appropriate for the group you are adding.
|
|
9.
|
When your selections are complete, click the Add User Group button to create the new User Group and apply the selected permissions.
|
